Step One — Install Apache
Open Terminal type these commands:
sudo apt-get update
sudo apt-get install apache2
Afterwards, your web server is installed.You can do a spot check right away to verify that everything went as planned by visiting your server's
type (localhost) in your web browser..
Step Two — Install MySQL
sudo apt-get install mysql-server-5.6
Step Three — Install PHP
sudo apt-get -y update
sudo apt-get -y install phpmyadmin
Step Four: Basic Configuration
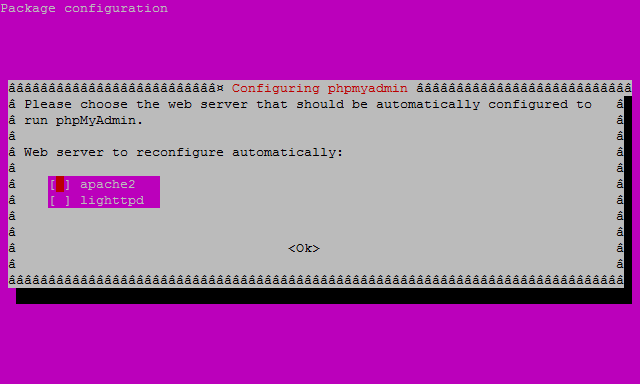
1) At the first screen, select apache2 by using the space bar, then hit enter to continue.
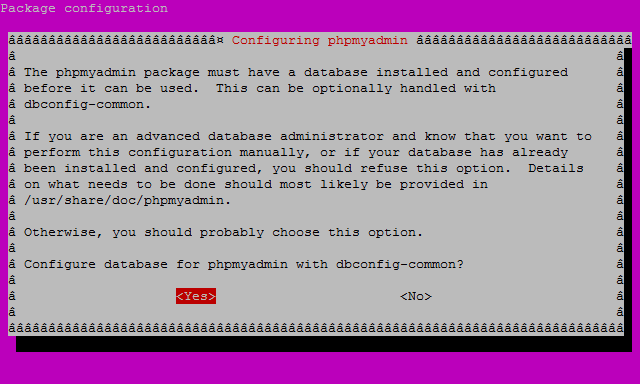
2) At the second screen, which asks “configure the database for phpmyadmin with dbconfig-common?”, select Yes , then hit enter to continue.
3) At the third screen enter your MySQL password, then hit enter to continue.
4) And finally at the fourth screen set the password you’ll use to log into phpmyadmin, hit enter to continue, and confirm your password.
Step Five : Finish the Configuration of Apache2
For a refresher on editing files...
/etc/apache2/apache2.conf
Add the following to the bottom of the file:
# phpMyAdmin Configuration
Include /etc/phpmyadmin/apache.conf
Then exit and save the file And, restart Apache2 service..
sudo service apache2 restart
Install php5-curl
sudo apt-get install php5-curl
Install php5-curl
sudo php5enmod mcrypt


No comments:
Post a Comment